Increase your click-through-rate through Rich Snippet Implementation
 No Comments

During our previous post, we covered the basic areas of structured data, we segmented the individual parts of a microdata schema.org, resulting in rich snippets and now we are going to see the practical implementation of the process, by using the Data Highlighter and the Structured Data Markup Helper.
This post is for webmasters whose website is related to restaurants, products (e.g. e-commerce sites etc.), articles, local business owners and events.
Using the Data Highlighter
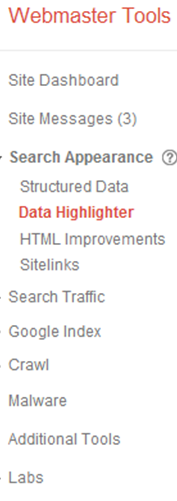
Step 1 – Creation of a Google Webmaster Tools Account
This step requires that you have an account on Google Webmaster Tools through which you will be able to produce the microdata markup to your HTML.
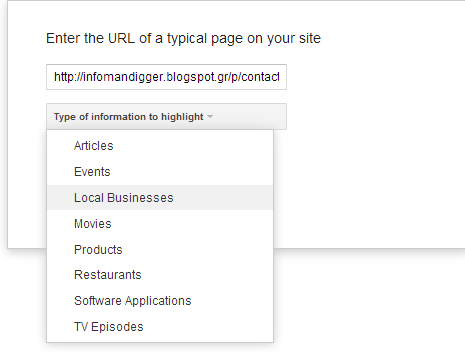
Step 2 – Type of information to highlight and page tagging
Let’s use for this purpose, this blog post:
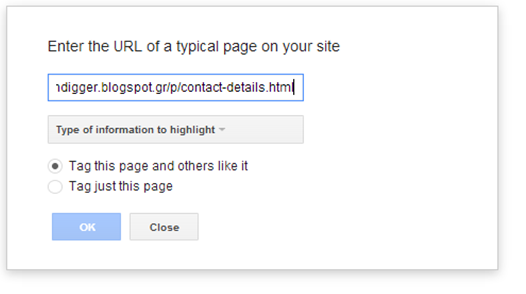
As you see you have 2 options:
Tag this page and others like it: Let’s assume that our blog or website is dedicated to various types of recipes or various types of cuisine (Italian, Spanish etc.)
Example:
www.mycuisine.com/italian-cuisine and www.mycuisine.com/spanish-cuisine
Once you start highlighting, by putting labels for the Italian cuisine page, Data Highlighter will display similar pages of you website. So, apart from the Italian cuisine, Data Highlighter will indicate the Spanish cuisine page, for which you are going to follow a similar procedure.
Tag just this page: This option is quite self-explanatory; in other words, this page concerns the page that we have in our tab.
For our ‘’experiment’ we are going to use the blog, as seen on the screenshot above and we’ll assume that it’s a local business.
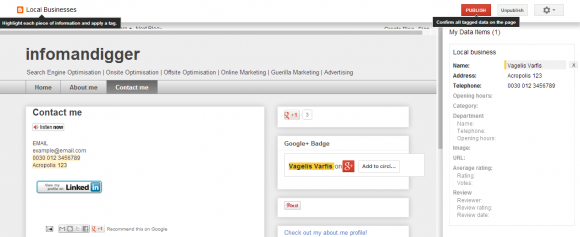
Step 3 – Tag your page
Make sure to mark up fields like Name, Address and Telephone as seen in the screenshot below.
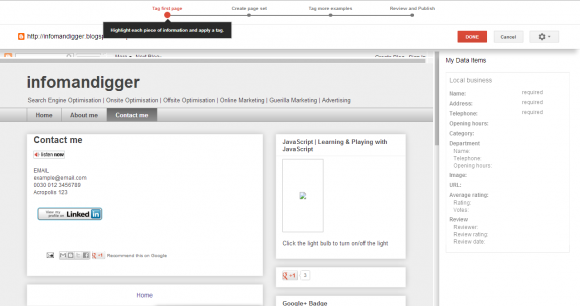
All you have to do is to mark up the required info in the right label and Google will automatically transfer this info within the respective field as seen on the right of the screenshot below. You follow the similar process for all the other fields.

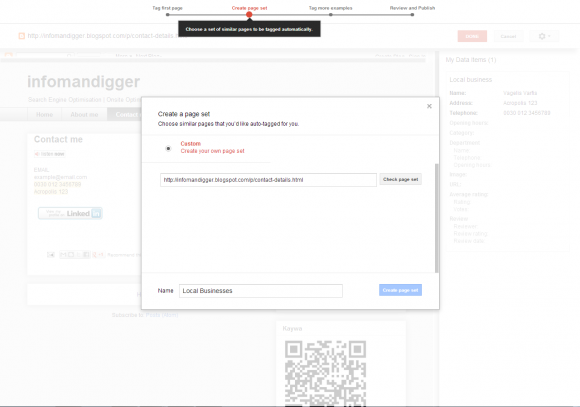
Step 4- Create Page Set
As mentioned earlier, if you have a website whose pages are relevant (e.g. music site with different kind of music or a recipe site with different types of cuisine ) you can select the related pages that you wish to be auto-tagged for you and once you make your choice, Google will do it for you!
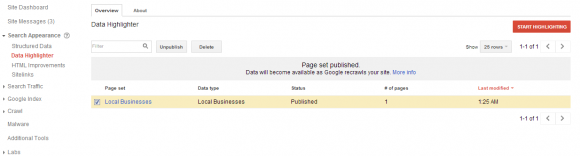
Step 5- Publish
The last part of this process allows you to immediately publish the marked up fields for your website.
Going back to Google Webmaster Tools we will be able to see that the page set is published and the data will be available once Google crawls our site/blog.
TIP: In order to make sure that your data has been crawled by Google and appears on SERPs you can use the Structured Data Testing Tool.
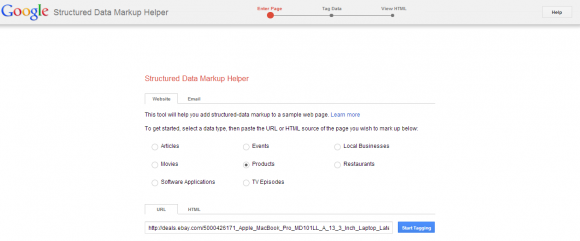
Structured Data Markup Helper
Recently, Google announced the release of Structured Data Markup Helper which helps you add structured data mark up to a sample page and once you complete the process, depending on the programming knowledge that you have, you can either implement it yourself or notify your development team.
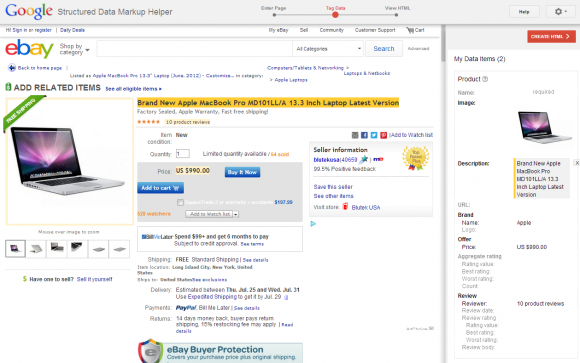
Let’s assume that our website is e-bay and we want to tag from e-bay an Apple MacBook 13.3 inch.
Step 1- Define Type of Structured Data and URL
Step 2- Tag Data
Once you select the page you want to tag on, then the next step is to markup your item (laptop), which is in the page. As you see on the screenshot below, on your left side you have all the fields available that will allow you to markup your information underneath your Data Items field. The more info you are providing now, the more info is going to be displayed in the form of rich snippets on SERPs.

Step 3- Finalize your Data Items fields
It is up to the SEO professional to fill in as much information as possible in the Data Items section, so that more information appears on the SERPs:
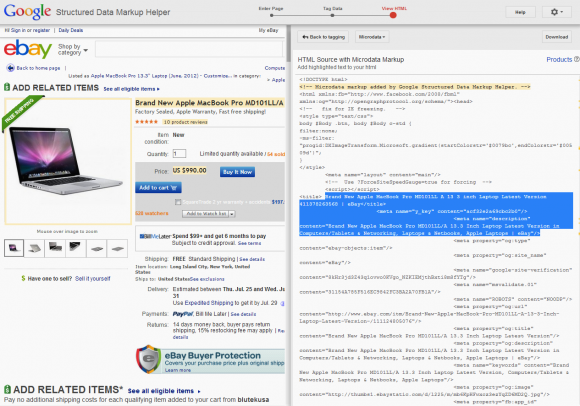
Having marked up all the product details we want for our e-shop, we will proceed to the next step, which is the creation of the HTML. The case in point, the HTML is not implemented automatically by Google within our code, but we will have to either implement it ourselves in the code, or notify the development team for this purpose.
Step 4- Implementation of code
So all you have to do is to copy/paste the microdata markup to your code.
Step 5- Rich snippets Appearance on SERPs
The HTML source with the microdata markup will appear on the search engine results page, in the form of rich snippets, as you can see below:

This process should be followed for each product that you have within your e-commerce site.
Even though it’s a challenging process it will be rewarding as you will see an increase on your CTR.
Happy marking up!